• Home
  • Suggest A DIY
  • DIY Newsletter

Jewelry Making

DIY Jewelry, Beads And Patterns

  • About CraftGossip
  • Our Network
    • Bath & Body Crafts
    • Candle Making Ideas
    • Crochet Ideas
    • Cross Stitch
    • Edible Crafts
    • Felting Patterns
    • Glass Art
    • Home & Garden Ideas
    • Indie Crafts
    • Jewelry Making
    • Kids Crafts
    • Knitting Patterns
    • Lesson Plans
    • Needlework
    • Party Ideas
    • Polymer Clay
    • Quilting Ideas
    • Recycled Crafts
    • Scrapbooking
    • Sewing Patterns
    • Stamping
    • DIY Weddings
    • Not Craft Ideas
  • Giveaways
  • Roundups
  • Christmas
  • Search

7+ Ways To Make Your Own Breast Milk Jewelry

October 11, by Shellie Wilson.

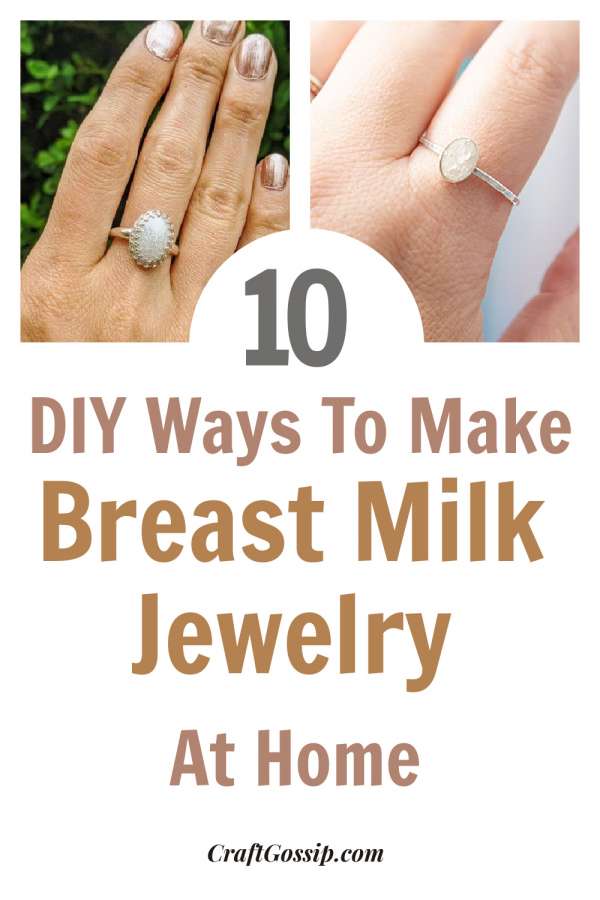
Breast milk is liquid gold and for some parents, saving a few drops of the breastmilk and preserving it into jewelry is a treasured keepsake. It certainly wasn’t around when I was having my babies otherwise I probably would have considered doing it too.

So how does it all work? Well first you need to preserve the breast milk, this is usually done by adding a breastmilk preserving powder and turning the milk from its liquid form into a dry substance that you can then work with. Such as stirring it into resin to pour or mold.  Why does it need to be preserved? Breast milk contains high levels of bacteria and preserving powder has been tried and tested and it really is the easiest way to go, buying a readymade powder. Unless you have a science degree, which I do not.

So how long does Breast milk jewelry last? If cast into resin correctly (as in you used the correct preserving powder) then it will last the lifetime of the resin, obviously smashing it or extreme temps could damage the resin as with all resin styled jewelry. Remember this is now a man-made stone or filler for your ring or necklace. I highly suggest UV Casting resin as it does not yellow with age.

If you are new to jewelry making and don’t already have basic jewelry making supplies then you might consider just buying a breast milk jewelry kit that contains everything you need  ( minus the breast milk) to complete your keepsake jewelry.

I really like the pearl-styled Milk balls, which allow you to place them in necklace cages like these, but I must say the rings in the picture above look like Australian opals. So pretty!

So how much milk do you need? it’s around 5ml, but I would say express a little more so you have enough breast milk to play around and allow for some mistakes. Same for the amount of preserving powder that you will need for making Breast Milk Jewelry, buy extra so you can play around.

Breast Milk Jewelry Diy: A Step-by-step Guide 

DIY Breast Milk Jewelry – How I Made My Breast Milk Ring – The Rose Mama

How To Easily Make Your Own Breast Milk Jewelry 
DIY Breast Milk Ring From Start To Finish

Breastmilk Jewelry Keepsake DIY #1 | Eco Mammi Blog

Next Idea:

  • How To Make A Resin Rolling Tray
«
»

Have you read?

DIY Cricut Cut Faux Leather Earrings

Welcome to this step-by-step tutorial on how to create your own unique and stylish earrings using Dollar Tree Faux Leather and a Cricut machine. If you’re someone who loves crafting and is always on the lookout for new and exciting projects, then this tutorial is perfect for you. Not only are these earrings easy to make, but they also have a natural and bohemian look that is perfect for those who love earthy and organic styles.

Making these earrings is a simple and budget-friendly project that can be completed with just a few supplies from the Dollar Tree and your trusty Cricut machine. The faux leather is a great alternative to real leather as it’s more affordable and easier to work with, allowing you to create beautiful and unique earrings without breaking the bank. Plus, with the Cricut machine, you have the ability to cut out any design you want, making these earrings truly one-of-a-kind.

This tutorial is perfect for crafters of all skill levels, whether you’re a beginner or an experienced crafter. The instructions are easy to follow and the end result is a beautiful and stylish pair of earrings that you’ll be proud to wear. So, gather your materials, fire up your Cricut machine and let’s get started on creating some beautiful and unique earrings that you’ll love to wear.


RSS From The Network

  • How to make a waterproof garden mushroom
  • Jack o’Lantern Cross Stitch Patterns
  • Pumpkin Knitting Patterns
  • Halloween Amigurumi Book
  • Am I Ready To Start Wholesaling My Crafts?
  • How to Make a Double Swing Halloween Card
  • Easy Scarf Knitting Patterns for Beginners
  • Mini Album with Purse Shaped Holder
  • Fall Math Activities
  • Christmas Friends Snowman Crochet ePattern

Trending popular ideas

12 Free Peyote Beading Patterns
13 DIY Leather Bracelets You Can Make At Home
7+  Ways To Make Your Own Breast Milk Jewelry
21 Halloween Jewelry Pieces You Can Make Yourself
Tips for a Beginning Jewelry Making (Or Any Jewelry Artist Needing a Little Pick-Me-Up)
Beach Stone Jewelry
How To Make A Resin Rolling Tray
6 Ways To Make A Button Necklace
Triangle Earrings Tutorial
17 DIY Dangle Earrings You Can Make Yourself

Categories

Beading Craft Inspirations DIY Tutorials and Patterns Felt/Fiber Jewelry For Men Jewelry Making - General Jewelry making - Supplies Jewelry Making Techniques Jewelry Making Tutorials and Ideas necklace recycled/upcycled Wire Work

Copyright © 2023 · CraftGossip | Start Here | Contact Us | Link to Us | Your Editors | Privacy and affiliate policy

Copyright © 2023 · Sprinkle Theme on Genesis Framework · WordPress · Log in