• Home
  • Suggest A Craft
  • DIY Newsletter

Jewelry Making

DIY Jewelry, Beads And Patterns

  • About CraftGossip
  • Our Network
    • Bath & Body Crafts
    • Candle Making Ideas
    • Crochet Ideas
    • Cross Stitch
    • Edible Crafts
    • Felting Patterns
    • Glass Art
    • Home & Garden Ideas
    • Indie Crafts
    • Jewelry Making
    • Kids Crafts
    • Knitting Patterns
    • Lesson Plans
    • Needlework
    • Party Ideas
    • Polymer Clay
    • Quilting Ideas
    • Recycled Crafts
    • Scrapbooking
    • Sewing Patterns
    • Card Making
    • DIY Weddings
    • Not Craft Ideas
  • Giveaways
  • Roundups
  • Store
  • Search

DIY Chain Bead Earring Tutorial

January 31, 2019 by Shellie Wilson

chain bead earring tutorial

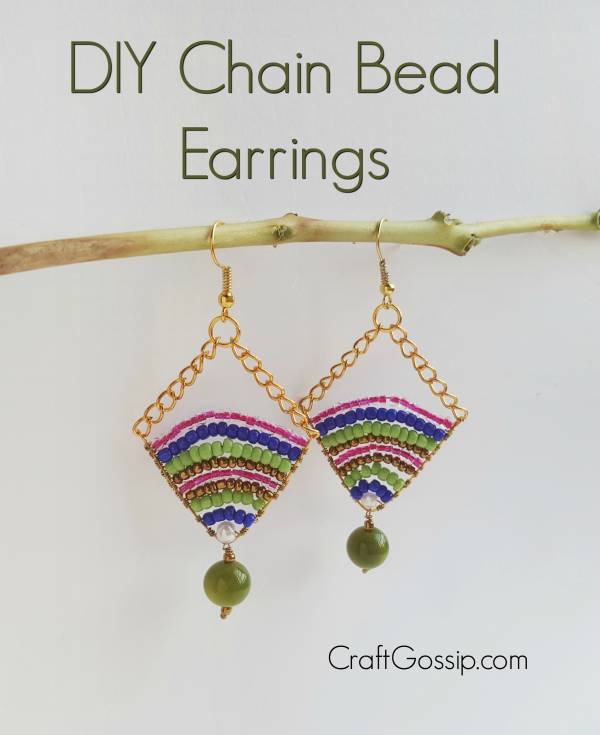
Chain and Beads Earrings – This jewelry making tutorial shows you how to create a stunning pair of boho or festival style earrings. These earrings are such a pretty design and can be color matched to your outfit. You don’t need to be an experienced jewelry making to create these DIY earrings.


DIY Jewelry

List of Supplies:
1. Jewelry wire – 18 gauge and 22 gauge
2. Jewelry pliers – cutting and looping pliers
3. Seed beads – 3 to 4 different colors
4. Medium size beads – 2 (1 for each pair)
5. Jump rings – 2
6. Earring hooks -2
7. Jewelry chain
8. Bead stopper wire
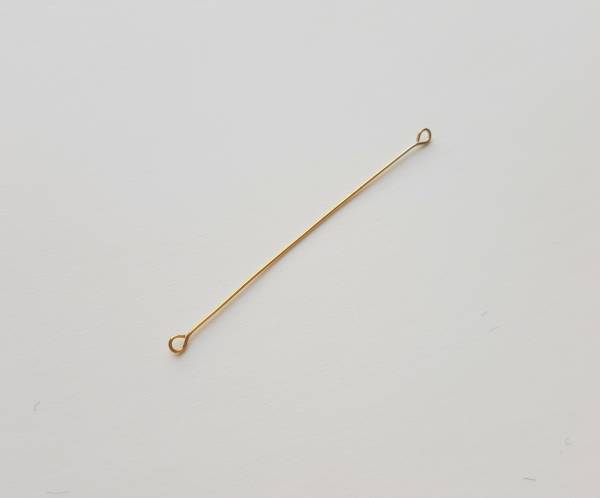
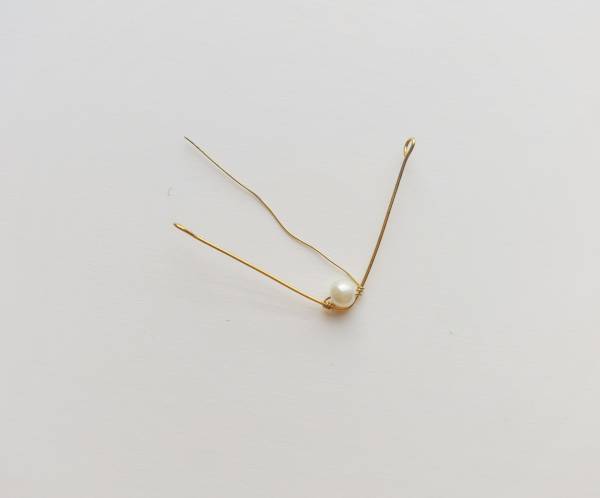

Step 1:

Cut a piece of 18 gauge wire (6 cm) will do) and create small loops on both open ends of the wire.


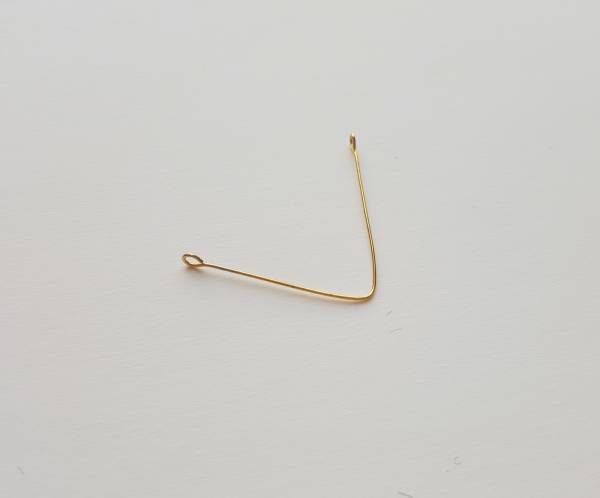
Step 2:Bend the wire to 90 degrees by keeping even amount of wire on both sides.


Step 3:Cut out a small piece of 22 gauge wire and coil it around any one side of the bent wire (near the
bend).


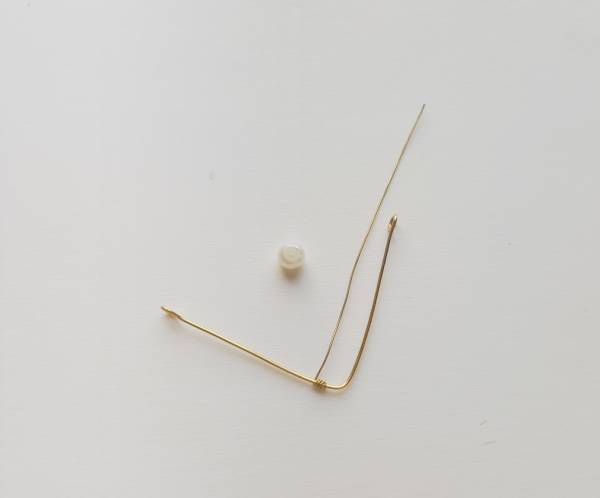
Step 4: Insert a bead into the wire (22 gauge wire) and coil the open end of the wire around the other side
of the bend.


Step 5:


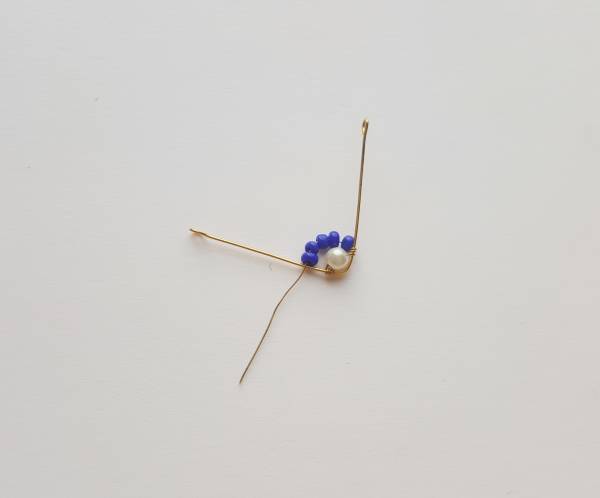
Cut out another small piece of wire (but longer than the previous one) and coil it around any one
sides of the bent wire. Keep the second coiled wire adjacent to the first one. Insert seed beads into
the wire until reaching the other side of the bend, above the first beading.

Step 6: Keep adding wired beads until the bent wire is full.


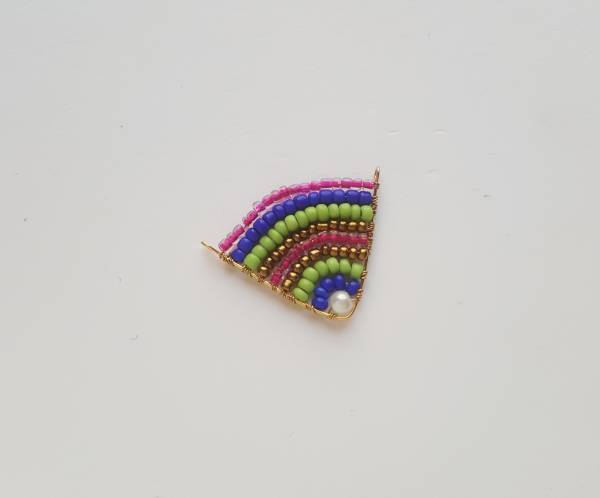
Step 7:Take a bead stopper wire and insert 1 seed bead and then 1 medium size bead of your choice; and
then another seed bead into the bead stopper wire through its open end.

Step 8:

Draw the open end of the beaded wire from the previous step and draw it through the angled part
of the bent beaded wire. Draw the wire from front to back and bringing it to the bottom again. Coil
the remaining wire around itself to secure the beading in the bead stopper wire.


Step 9:

Grab an earring hook, a jump ring and 2 same sized jewelry chains (2.5 cm). Arrange then as shown
in the picture of this step.

Step 10:

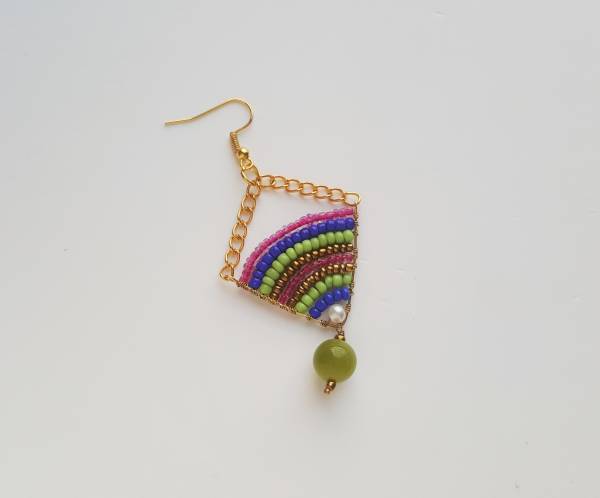
Attach the open end of the jewelry chain with the loops on both sides of the bent wire.
Similarly create the other pair.

Next Idea:

  • DIY Handmade Beaded Dangle Charm Earrings
«
»

Have you read?

Hama BioBeads Review: The Eco-Friendly Fuse Beads You’ll Love

As a long-time crafter, I’ve worked with all kinds of materials, but there’s something about fuse beads that never gets old. The creativity, the colors, the nostalgia—it’s all part of the fun! But let’s be honest, traditional plastic beads aren’t exactly great for the environment. That’s why I was so excited to try Hama BioBeads, an eco-friendly alternative that promises all the fun of classic Hama beads without the plastic guilt. So, do they live up to the hype? Let’s dive in!

What Are Hama BioBeads?

Hama BioBeads are a biodegradable version of the classic Hama fuse beads. Instead of being made from petroleum-based plastic, these beads are crafted from a plant-based, eco-friendly material that naturally decomposes over time. That means less plastic waste while still enjoying the same vibrant colors and creativity that fuse bead lovers expect.

First Impressions: Do They Feel Different?

When I first opened the pack, I was curious—would they feel different from traditional beads? The answer: not really! The beads are slightly smoother to the touch, but they’re just as easy to handle, pick up with tweezers, and place on a pegboard. The colors are just as bright and bold, which was a big relief since I was worried they might look dull or faded.

One of the things I love about these beads is that they’re the same size as regular Hama beads, so they work with all my existing pegboards and accessories. No need to buy new tools or change my crafting process!

How Do They Fuse?

Now, onto the real test—how well do they iron together?

I followed my usual fusing process, using parchment paper and a medium heat setting on my iron. The beads melted together perfectly, just like regular Hama beads. No weird smells, no uneven melting—just smooth, well-bonded designs.

I also noticed that once cooled, the fused beads felt a bit sturdier than traditional plastic beads. That’s a huge plus because sometimes regular beads can feel brittle or break apart too easily.


What Makes Hama BioBeads Special?

? Eco-Friendly & Biodegradable – The biggest selling point! These beads naturally break down over time, reducing environmental impact.
? Non-Toxic & Safe for Kids – Made from natural materials, they’re a safer option for little crafters.
? Same Great Quality – They look, feel, and fuse just like classic Hama beads—no sacrifice in quality!
? Works with Existing Hama Accessories – You don’t need special pegboards or tools; they fit right into your current stash.
? Great for Schools & Eco-Conscious Crafters – If you’re an educator or a parent looking to introduce sustainability to kids in a fun way, these are perfect!

The only potential downside is that since these are a newer product, they may not be as widely available as traditional Hama beads. Some colors also seem to be in and out of stock, so if you see a set you love, I’d suggest grabbing them while you can.

 If you love fuse bead crafting but want a more sustainable option, Hama BioBeads are a fantastic choice. They’re just as fun, colorful, and easy to use as regular Hama beads, but they come with the added bonus of being better for the planet. Whether you’re a hobby crafter, a parent, or a teacher, these beads are a guilt-free way to get creative.

So if you’re looking to make your crafts a little greener, give Hama BioBeads a try!  Check them out here!

RSS More Articles

  • Best Sewing Machine for Quilting Beginners: Your No-Stress Buying Guide
  • McCall’s Half-Price Pattern Sale – Starts Friday!
  • Learning about Chad for Kids – Lesson Plan
  • Peacock Stitch Crochet Cardigan in Sirdar Country Classic
  • FREE Mother and Child Mother’s Day Digital Stamp
  • I Found a Table Made from Mannequin Legs—and I’m Still Not Over It
  • Cheerful Sun Cross Stitch Patterns
  • Yarn Cozy Knitting Patterns
  • 12 Scrapbook Layout Ideas for Mom
  • Whooo’s Ready to Quilt? The HOOT Quilt Pattern is a Hoot-Tastic Must-Have

Pick Your Blog

  • Sewing
  • Knitting
  • Quilting
  • Crochet
  • Home & Garden
  • Recycled Crafts
  • Scrapbooking
  • Card Making
  • Polymer Clay
  • Cross-Stitch
  • Edible Crafts
  • Felting
  • Glass Art
  • Indie Crafts
  • Kids Crafts
  • Jewelry Making
  • Lesson Plans
  • Needlework
  • Bath & Body
  • Party Ideas
  • Candle Making
  • DIY Weddings
  • Not Craft
  • Free Craft Projects

Categories

Beading Book Reviews Craft Inspirations Crystals DIY Tutorials and Patterns Felt/Fiber Halloween Jewelry For Men Jewelry Making - General Jewelry making - Supplies Jewelry Making Give Away Jewelry Making Techniques Jewelry Making Tutorials and Ideas metalwork Mixed Media necklace Polymer Clay Product Reviews recycled/upcycled Wire Work

Copyright © 2025 · CraftGossip | Start Here | Contact Us | Link to Us | Your Editors | Privacy and affiliate policy

Copyright © 2025 · Sprinkle Theme on Genesis Framework · WordPress · Log in