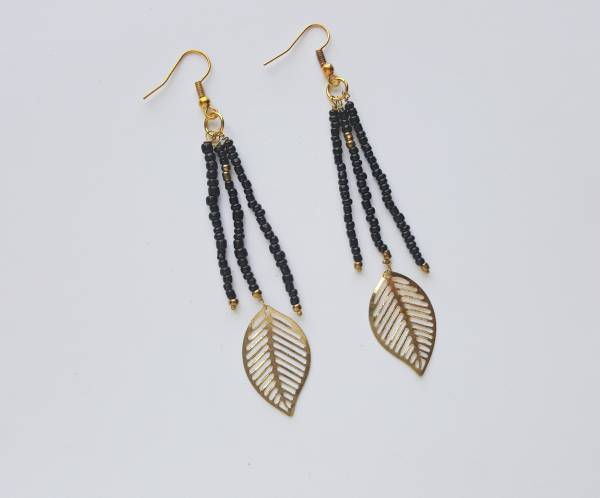
If you’ve been wanting to try an easy beginner jewellery project, these seed bead charm earrings are a lovely place to start. This tutorial shows you how to make your very own handmade earrings using seed beads and a small leaf charm for a delicate, stylish finish. You can use the same leaf charm or swap it for a similar charm to create your own unique version.
This is a fun and beginner-friendly jewellery making tutorial that’s perfect for teens, new crafters, or anyone who enjoys making pretty accessories without needing lots of fancy supplies. These earrings are easy to customise with different bead colours and charms, so you can match them to your outfit, the season, or even a party theme.
It’s also a great project for craft parties, teen craft activities, or a creative weekend session with friends. Quick, affordable, and surprisingly satisfying to make, these DIY earrings are a fun way to explore easy handmade jewellery projects while creating something you’ll actually want to wear.
This jewelry making tutorial uses a small leaf charm . You can use the same charm or similar item to get the same effect. This craft project is great for teenagers who are looking to try their hand at making their own jewelry projects. Such a fun activity for parties too.
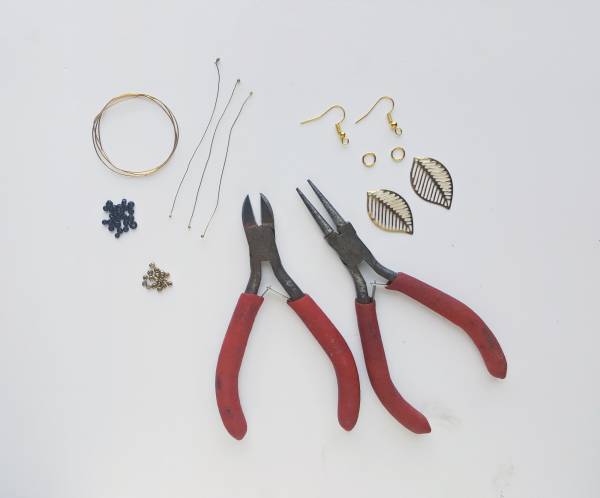
List of Supplies:
1. Earring hooks – 2
2. Jump rings – 2
3. Bead stopper
4. Jewelry charms – 2
5. Seed beads
6. Jewelry wire – 24 gauge
7. Craft pliers
Instructions:
Step 1:
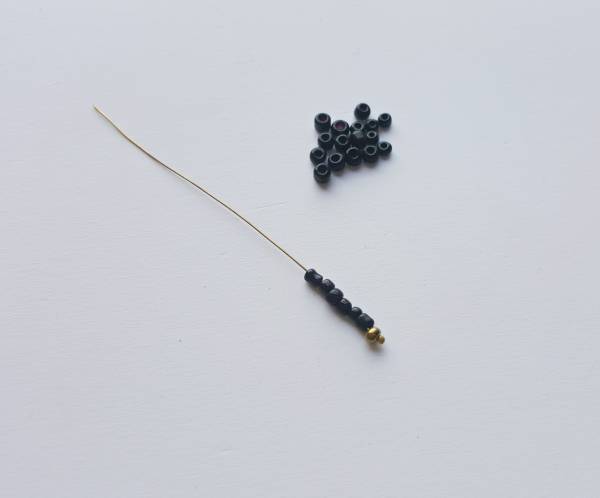
Take a bead stopper and insert seed beads into it. Keep beading until it reaches the required length.
But also make sure that there is enough wire at the end to create a loop and a few coils.
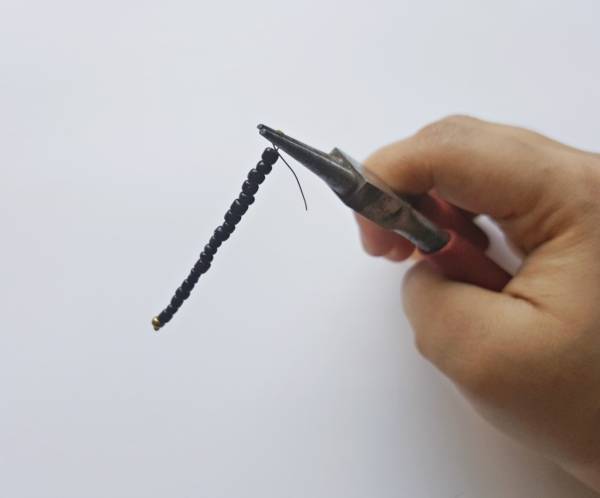
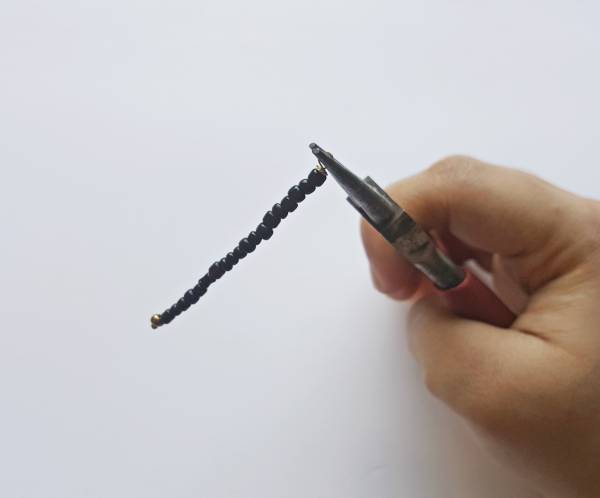
Step 2:
Take the looping pliers and hold it right next to where the beading ends. Create a loop with the
intact wire (at the end of the beading).
Step 3:
Bring the wire under the loop and coil the remaining wire below the loop to secure the beading.
Step 4:
Similarly, bead 2 or more wires (wire with beading end/ bead stopper).

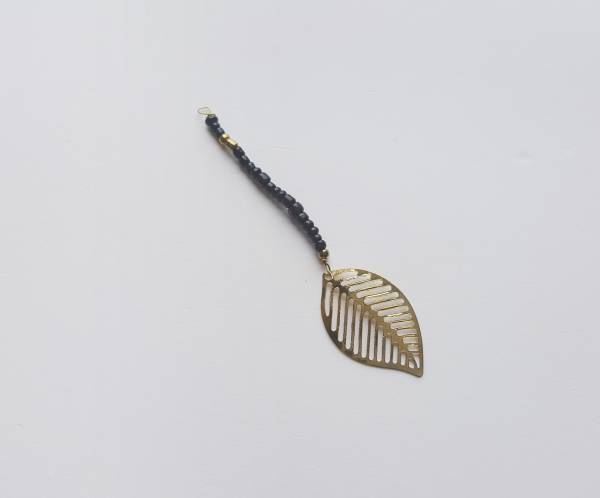
Step 5:
Take a small piece (about 6 cm will do) of 24 gauge wire and insert its open end through the loop of
the selected charm. Draw the wire towards its closed end and coil a few times to secure the charm with the wire.

Step 6:
Bead the rest of the wire but keep enough wire at the open end to create a loop and a few coils
under the loop. Once you are done beading create a loop right next to the end of beading and then
coil the remaining wire below the loop.
Step 7:
Grab an earring hook, a jump ring and arrange the beaded wires as you want to attach them.
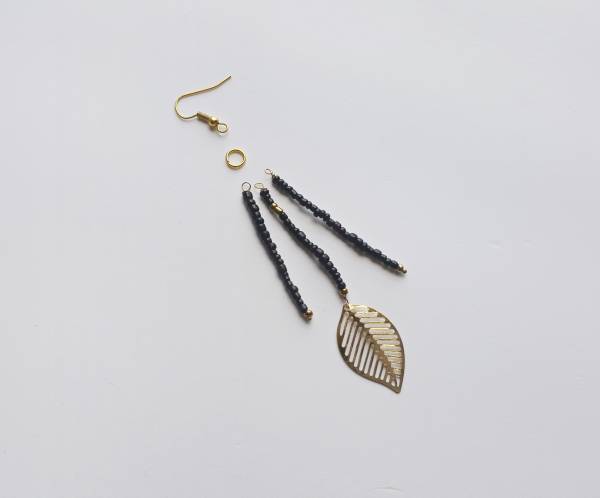
Step 8:
Attach the earring hook with the jump ring and then attach the beaded wires with the same jump
ring.
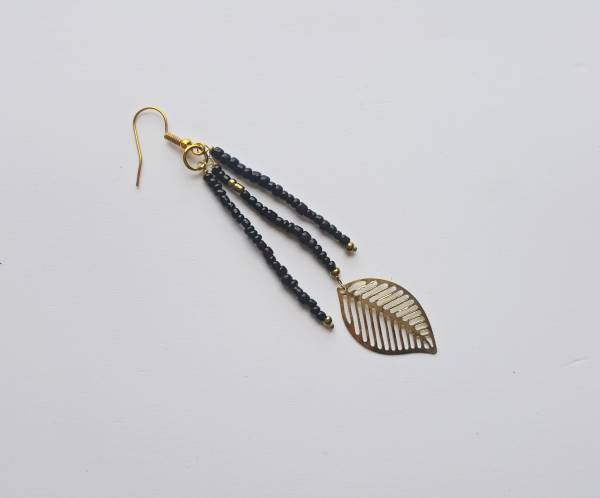
Step 9:
Similarly create the other pair of earrings.