• Home
  • Suggest A DIY
  • DIY Newsletter

Jewelry Making

DIY Jewelry, Beads And Patterns

  • About CraftGossip
  • Our Network
    • Bath & Body Crafts
    • Candle Making Ideas
    • Crochet Ideas
    • Cross Stitch
    • Edible Crafts
    • Felting Patterns
    • Glass Art
    • Home & Garden Ideas
    • Indie Crafts
    • Jewelry Making
    • Kids Crafts
    • Knitting Patterns
    • Lesson Plans
    • Needlework
    • Party Ideas
    • Polymer Clay
    • Quilting Ideas
    • Recycled Crafts
    • Scrapbooking
    • Sewing Patterns
    • Card Making
    • DIY Weddings
    • Not Craft Ideas
  • Giveaways
  • Roundups
  • Store
  • Search

Holiday Gift Idea for Little Jewelry Makers

November 24, 2012 by Stacie Hooder

Craft Bands help kids 8 and up create their own charm bracelets.
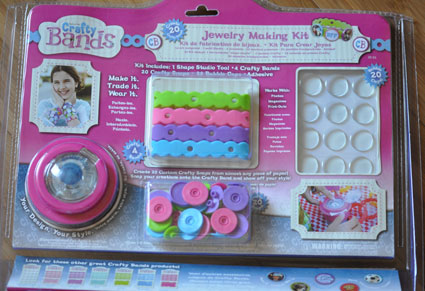
This weekend I had the chance to review Crafty Bands from Epiphany Crafts. These new design-your-own-charm bracelets for kids are colorful, fun and easy to make. Your kids will be eager to start making their own personalized charms from photos, magazine pages or other printed images once they see how easy it is with Crafty Bands.

detail from the Crafty Bands box

Shape Studio Tool

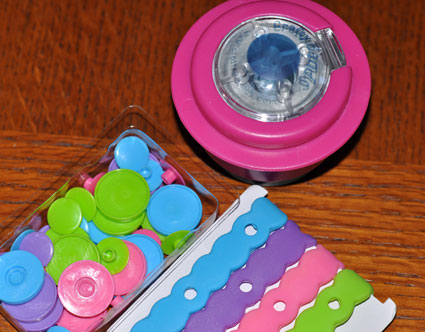
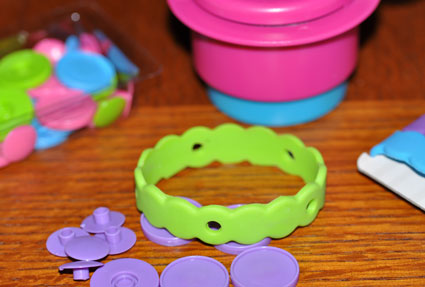
The Crafty Bands Starter Kit is reasonably priced at $29.95. You get the Shape Studio Tool and pieces to make four complete Crafty Bands in the kit. The Refill Kits are priced at $6.99; these include four Crafty Bands and 20 Crafty Snaps. Refill Bubble Caps are $4.99 for 20 pieces.

The starter kit include everything needed to make 4 complete Crafty Bands.

Refill Kits are available in a variety of colors.

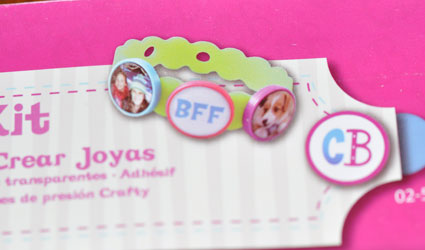
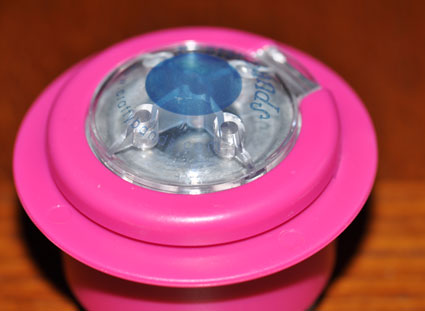
Each Crafty Band will hold 5 Crafty Snaps with your choice of images. I used a photo of a feathered mask in the sample Crafty Band I put together.

The Shape Studio Tool cuts your images and sets the Bubble Cap to protect your images.
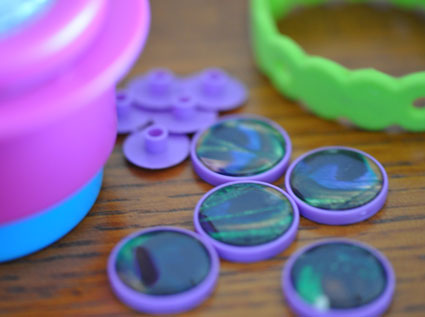
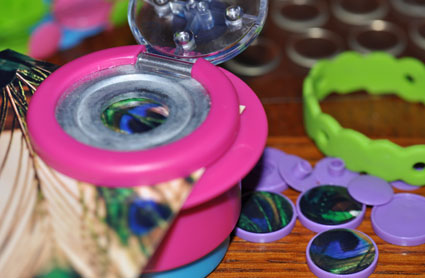
The Shape Studio Tool was easy to use and helped line up the Bubble Cap over the image. Using the adhesive, the images fit easily and securely into the Crafty Snaps and then lock into place on your one of a kind Crafty Band.

The images are easy to fit into the Crafty Snaps.

Completed Crafty Band!

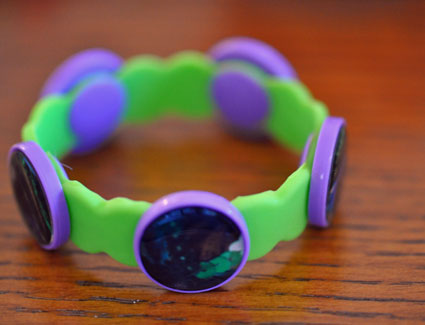
Think your kids will like this product? Leave a comment at the giveaway and tell me why for your chance to win this completed Crafty Band and the rest of the kit including the Shape Studio Tool!

Next Idea:

  • How To Start Jewelry Making: Beginner Tools,…
«
»

Comments

  1. Bev C says

    November 24, 2012 at 7:05 pm

    What a super cute idea, my twin nieces would have so much fun making their own individual jewellery.

    Happy days.
    Bev.xoxo

  2. Penny says

    November 25, 2012 at 4:44 am

    I have several little girls in my family that would LOVE this kit … I also have a good friend that’s a crafter like me and it would be the perfect gift for her little girl that has a birthday coming up. Thanks for the giveaway!

  3. Candice Cannon says

    November 25, 2012 at 5:42 am

    I have never seen anything like this before. My granddaughter would spend many productive hours using this product. She lives in the mountains and her mom is always looking for something to occupy her free time other than television. Thank you for this giveaway opportunity.

  4. Jessie says

    November 25, 2012 at 6:24 am

    My kids love to craft. My husband works most evenings. After homework is finished we often sit at the table and do a craft project together. This looks like a perfect project for them.

  5. Mary says

    November 25, 2012 at 2:20 pm

    My 8-year-old granddaughter loves jewelry. This kit gives her the opportunity of using her creativity to design her own bands. I’d love to have this for her.

  6. Ellen says

    November 25, 2012 at 3:27 pm

    My 8yr old grand-daughter would love to share this craft with her 4yr old sister – both being avid craft fans, especially having the Shape Studio tool to make it simple for them both. I showed the pics above to the 4yr old and her comment was “they are so cutier Gran, can I make some?.

  7. Jayme says

    November 25, 2012 at 4:40 pm

    This is exactly the kind of craft kit I’ve been looking for. My granddaughter needs a non-messy jewelry making craft and this fits the bill. Thanks for the chance to win!

  8. Kitra Woodall says

    November 26, 2012 at 2:01 pm

    My 4 year old is ALWAYS trying to make jewelry “just like momma’s” whenever I sit down to bead or create. She always gets frustrated! This kit would be perfect for her to turn out her own project she could be proud of! Great review and thanks for the give-away!

  9. Sue Young says

    November 26, 2012 at 3:39 pm

    I wonder if I could use these on my robot plushies – especially to add my logo to them? I would definately like to experiment!

  10. Miriam Prantner says

    November 27, 2012 at 1:24 pm

    My daughter would LOVE it. She likes anything crafty and always wants me jewelry….

Have you read?

Jewelry Making Tools For Beginners: What You Actually Need

Starting a new craft can be exciting, but it can also turn into a shopping rabbit hole very quickly. Jewelry making is no exception. One minute you are buying a packet of beads, and the next you are staring at twenty types of pliers wondering if you need all of them.

The truth is, you do not need a huge collection of tools to start making handmade jewelry. For beginner jewelry making projects like beaded necklaces, bracelets, earrings and charms, a small set of basic tools will take you a long way.

This guide covers the jewelry making tools beginners actually need, what each tool is used for, and which extras are nice to have later. It is designed for real crafters with real budgets and real drawers already full of mysterious supplies.

If you are just starting out, pair this guide with an easy project like this DIY birthstone necklace or these easy silk thread earrings.

1. Chain Nose Pliers

Chain nose pliers are one of the most useful tools in jewelry making. They have flat inner jaws and tapered tips, which makes them ideal for gripping, bending and holding small findings.

Use chain nose pliers for:

  • opening and closing jump rings
  • flattening crimp beads
  • holding small components
  • bending wire
  • adjusting clasps
  • tucking wire ends

If you only buy one pair of pliers to begin with, make it chain nose pliers. They are the workhorse of the jewelry making toolbox.

2. Round Nose Pliers

Round nose pliers have smooth, rounded jaws that taper to a point. They are used for making loops in wire.

Use round nose pliers for:

  • making simple loops
  • making wrapped loops
  • creating eye pins
  • shaping wire
  • making dangles for earrings
  • creating small charms

Round nose pliers are especially useful if you want to make earrings, pendant drops or wire-wrapped bead charms. Once you learn how to make a simple loop, a whole world of handmade jewelry opens up.

3. Flush Cutters Or Jewelry Cutters

Do not use your best sewing scissors for cutting jewelry wire. I say this with the voice of experience and regret.

Jewelry cutters are designed to cut wire cleanly. Flush cutters are especially useful because they leave one side of the cut wire flatter and neater.

Use jewelry cutters for:

  • cutting beading wire
  • trimming head pins
  • cutting eye pins
  • trimming soft jewelry wire
  • cutting chain

Keep your cutters for jewelry only. Cutting memory wire or thick hardware wire can damage delicate cutters, so check what your cutters are designed to handle.

4. Crimping Pliers

Crimping pliers are used to close crimp beads and crimp tubes neatly. You can flatten crimps with chain nose pliers, but crimping pliers create a more rounded, professional finish.

Use crimping pliers for:

  • finishing beaded necklaces
  • finishing beaded bracelets
  • securing clasps
  • shaping crimp tubes
  • making stronger jewelry ends

If you are only making one or two simple projects, chain nose pliers may be enough. But if you plan to make lots of necklaces or bracelets, crimping pliers are worth adding.

For more help with this technique, see our guide on using crimp beads without ruining your necklace once it is published.

5. Bead Board

A bead board is a tray with grooves that help you plan necklace and bracelet designs before stringing them. It usually has measurement marks, which makes it easier to create the right length.

Use a bead board for:

  • planning bead patterns
  • measuring necklace length
  • balancing designs
  • keeping beads from rolling away
  • arranging multiple strands

You do not absolutely need a bead board, but it is very helpful for beginners. If you do not have one, use a tea towel or felt mat on your table. The soft surface helps stop beads from escaping.

6. Bead Mat

A bead mat is a soft surface used for working with beads. It stops beads from rolling and gives you a clean workspace.

Use a bead mat for:

  • seed bead projects
  • sorting small beads
  • planning earrings
  • stringing bracelets
  • keeping beads visible

A simple felt square or soft cloth can work if you are not ready to buy a bead mat. The important thing is to avoid working directly on a hard, shiny table, unless chasing beads across the floor is part of your fitness plan.

7. Bead Stoppers

Bead stoppers are small spring clips that hold beads on wire while you are working. They are simple, cheap and surprisingly useful.

Use bead stoppers for:

  • keeping beads from sliding off wire
  • holding one end of a necklace
  • pausing a project safely
  • working on multi-strand jewelry

You can use masking tape or a small binder clip instead, but bead stoppers are neater and easier to remove.

8. Jump Ring Opener

A jump ring opener is a small ring worn on your finger with grooves for opening jump rings. It is not essential, but it can make repetitive work faster.

Use a jump ring opener for:

  • opening jump rings
  • attaching charms
  • making chain jewelry
  • connecting clasps
  • working on charm bracelets

If you make a lot of charm jewelry, this little tool is handy. If you are only starting out, two pairs of pliers will do the job.

9. Measuring Tape Or Ruler

Measuring matters in jewelry making. Necklaces, bracelets and anklets all need to fit properly.

Use measuring tools for:

  • necklace lengths
  • bracelet sizing
  • anklet sizing
  • chain lengths
  • bead spacing

A soft tape measure is especially useful because it can wrap around the wrist or neck. You can also use a ruler for straight wire and chain measurements.

10. Storage Containers

Beads multiply when you are not looking. One day you have a tidy little packet of beads, and suddenly you have seed beads, clasps, charms, wire, broken necklaces and something labelled “miscellaneous sparkle.”

Good storage makes jewelry making much easier.

Useful storage options include:

  • divided bead boxes
  • small jars
  • zip-top bags
  • labelled tubes
  • drawer organisers
  • tackle boxes
  • stackable craft containers

Sort by bead type, colour or project. There is no perfect system, only the one you will actually use.

Beginner Jewelry Making Supplies To Keep On Hand

Along with tools, it helps to have a few basic supplies ready.

A beginner jewelry making kit might include:

  • beading wire
  • jump rings
  • lobster clasps
  • crimp beads
  • head pins
  • eye pins
  • earring hooks
  • spacer beads
  • small charms
  • mixed beads

If you are buying supplies for the first time, look for a basic jewelry findings kit. These are often more affordable than buying every tiny packet separately.

Tools You Do Not Need Straight Away

Some jewelry tools are useful later, but beginners do not need them immediately.

You can wait before buying:

  • metal stamping tools
  • soldering equipment
  • resin tools
  • bead looms
  • torch tools
  • specialty wire jigs
  • expensive display stands
  • professional polishing machines

Start with simple projects first. Once you know what type of jewelry you enjoy making, it is easier to buy the right tools.

If metal stamping appeals to you, this ImpressArt bracelet making tutorial is a fun place to see how that style of jewelry can look.

Best First Projects For Your New Tools

Once you have your basic jewelry tools, try projects that build your skills gradually.

Good beginner projects include:

  • simple beaded bracelets
  • beaded necklaces with clasps
  • dangle earrings
  • charm bracelets
  • pendant necklaces
  • upcycled jewelry
  • wire bead charms

For a simple wearable project, try this wire necklace tutorial or this DIY wrap jewelry project.

What To Buy First If You Are On A Budget

If you are keeping costs down, start with:

  • chain nose pliers
  • round nose pliers
  • jewelry cutters
  • flexible beading wire
  • crimp beads
  • clasps
  • jump rings
  • beads

You can add a bead board, crimping pliers and storage boxes later.

A beginner jewelry making tool kit can be a good value if it includes decent pliers and cutters. Avoid very flimsy tools if possible, because they can make jewelry making more frustrating than it needs to be.

A Practical Beginner Tip

Do not buy every tool before making your first project. Make a simple necklace, bracelet or pair of earrings first, then see what you actually enjoy.

Some people fall in love with seed beads. Some adore wire wrapping. Some just want to make quick earrings from leftover beads. Your tool collection should grow around the kind of jewelry you actually want to make.

That is the nice thing about beginner jewelry making. You can start small, learn as you go, and still make something pretty enough to wear.


Tags

Bangles/Bracelets Beading Beginner Jewelry Making Book Reviews Craft Inspirations Crystal Jewelry Making DIY Necklace DIY Tutorials and Patterns earrings tutorials Felt/Fiber Halloween Jewelry For Men Jewelry Making - General Jewelry making - Supplies Jewelry Making Giveaways Jewelry Making Techniques Jewelry Making Tutorials and Ideas Mixed Media recycled/upcycled Wire Work

RSS More Articles

  • Everything You Need to Know About Embroidery Hoops
  • Needle Felting Fairy Tutorial by Santa Meada
  • Printable Stickers for Journals and Planners – Self Care
  • Stitch Your Favorite Fruit on a Sweater
  • 12 Color Wheel Inspired Scrapbook Layouts
  • Crafts With Old Bricks: Creative Ways To Upcycle Leftover Bricks
  • How To Make A Milk Mache Molding Compound
  • The 5 Outlet Placement Mistakes You Don’t Want to Make
  • Celebrate the Spirit of the Southwest with These Stunning Indian Navajo Tribal Quilt Patterns
  • Pricing Handmade Sewing Items Without Undervaluing Yourself

Pick Your Blog

  • Sewing
  • Knitting
  • Quilting
  • Crochet
  • Home & Garden
  • Recycled Crafts
  • Scrapbooking
  • Card Making
  • Polymer Clay
  • Cross-Stitch
  • Edible Crafts
  • Felting
  • Glass Art
  • Indie Crafts
  • Kids Crafts
  • Jewelry Making
  • Lesson Plans
  • Needlework
  • Bath & Body
  • Party Ideas
  • Candle Making
  • DIY Weddings
  • Not Craft
  • Free Craft Projects

Copyright © 2026 · CraftGossip | Start Here | Contact Us | Link to Us | Your Editors | Privacy and affiliate policy